백엔드/견고한 백엔드 만들기
Log와 모니터링
Dev갱이
2024. 8. 13. 12:46
728x90
monitoring 하는 여러가지 방법들이 존재하고 백엔드에 국한되지 않고 프론트에서도 꼭 필요하다. 이는 production 환경에서 문제를 해결하는데 있어서 중요한 역할을 하기 때문이다.
목표
- winston을 통해 Log 파일을 기록과 Log관리
- sentry를 통해 모니터링과 slack을 통한 실시간 알림 보내기
1. winston을 통한 Log파일 생성과 Log 관리
$ winston nest-winston
$ winston-daily-rotate-file
필요 라이브러리를 설치 해준다.
2. winston과 winston-daily-rotate-file을 위한 설정 파일 작성
- common/logger/winston.ts
import { WinstonModule, utilities } from 'nest-winston';
import winston from 'winston';
import winstonDaily from 'winston-daily-rotate-file';

const dailyOption = (level: string) => {
	return {
		level,
		datePattern: 'YYYY-MM-DD',
		dirname: `./logs/${level}`,
		filename: `%DATE%.${level}.log`,
		maxFiles: 30,
		zippedArchive: true,
		format: winston.format.combine(
			winston.format.timestamp(),
			utilities.format.nestLike(process.env.NODE_ENV, {
				colors: false,
				prettyPrint: true,
			}),
		),
	};
};

export const winstonLogger = WinstonModule.createLogger({
	transports: [
		new winston.transports.Console({
			level: process.env.NODE_ENV === 'production' ? 'http' : 'debug',
			format: winston.format.combine(
				winston.format.timestamp(),
				utilities.format.nestLike(process.env.NODE_ENV, {
					colors: true,
					prettyPrint: true,
				}),
			),
		}),
		new winstonDaily(dailyOption('warn')),
		new winstonDaily(dailyOption('error')),
	],
});
- main.ts
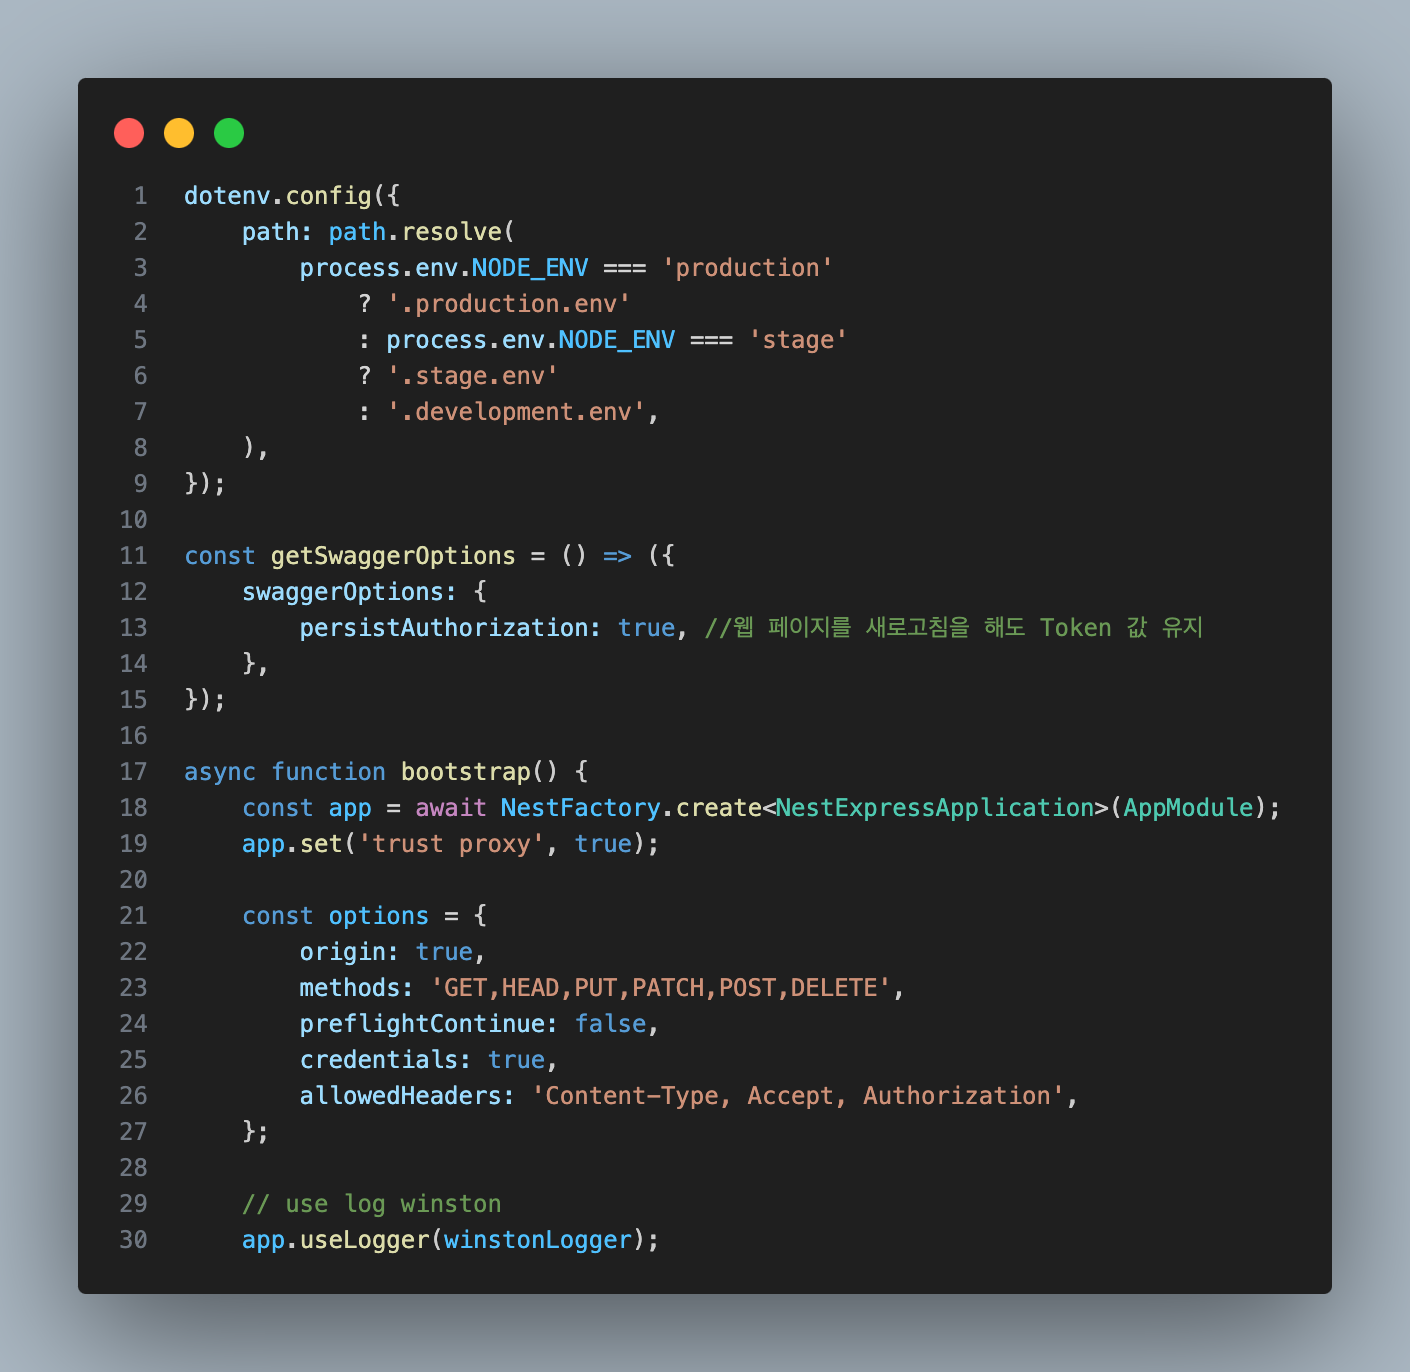
3. all-exception-filter에 winston logger 적용

일관된 response 에러를 던지기 위해 HttpExceptionResponse를 가지고
특정 에러 마다 로그를 기록하고 에러 response를 return 해준다.
4. 모니터링을 위한 sentry 라이브러리 설치 및 적용

sentry는 정말 너무나도 친절하다 document 공식문서도 정말 친절한데 그전에 sentry 생성시에 사용하고자 하는 nestjs를 선택하면 세팅하는 방법을 A to Z까지 친절하게 설명 해준다.
$ npm install --save @sentry/nestjs @sentry/profiling-node
// instrument.ts
import * as Sentry from "@sentry/nestjs"
import { nodeProfilingIntegration } from "@sentry/profiling-node";

Sentry.init({
  dsn: dns key,
  integrations: [
    nodeProfilingIntegration(),
  ],
  // Tracing
  tracesSampleRate: 1.0, //  Capture 100% of the transactions

  // Set sampling rate for profiling - this is relative to tracesSampleRate
  profilesSampleRate: 1.0,
});
// If you're using CommonJS (CJS) syntax, use `require("./instrument.js");`
import "./instrument.js";
// All other imports below
import { NestFactory } from '@nestjs/core';
import { AppModule } from './app.module';
async function bootstrap() {
const app = await NestFactory.create(AppModule);
await app.listen(3000);
}
bootstrap();주의 할 점으로는 instrument를 꼭 맨위에 import 해주어야 한다.
import { Module } from '@nestjs/common';
import { SentryModule } from '@sentry/nestjs/setup';
import { AppController } from './app.controller';
import { AppService } from './app.service';

@Module({
  imports: [
    SentryModule.forRoot(),
    // ...other modules
  ],
  controllers: [AppController],
  providers: [AppService],
})
export class AppModule {}
주의할점은 SentryModule을 AppModule을 import의 제일 상단에 넣어줘야 한다.
Sentry 세팅 완료!
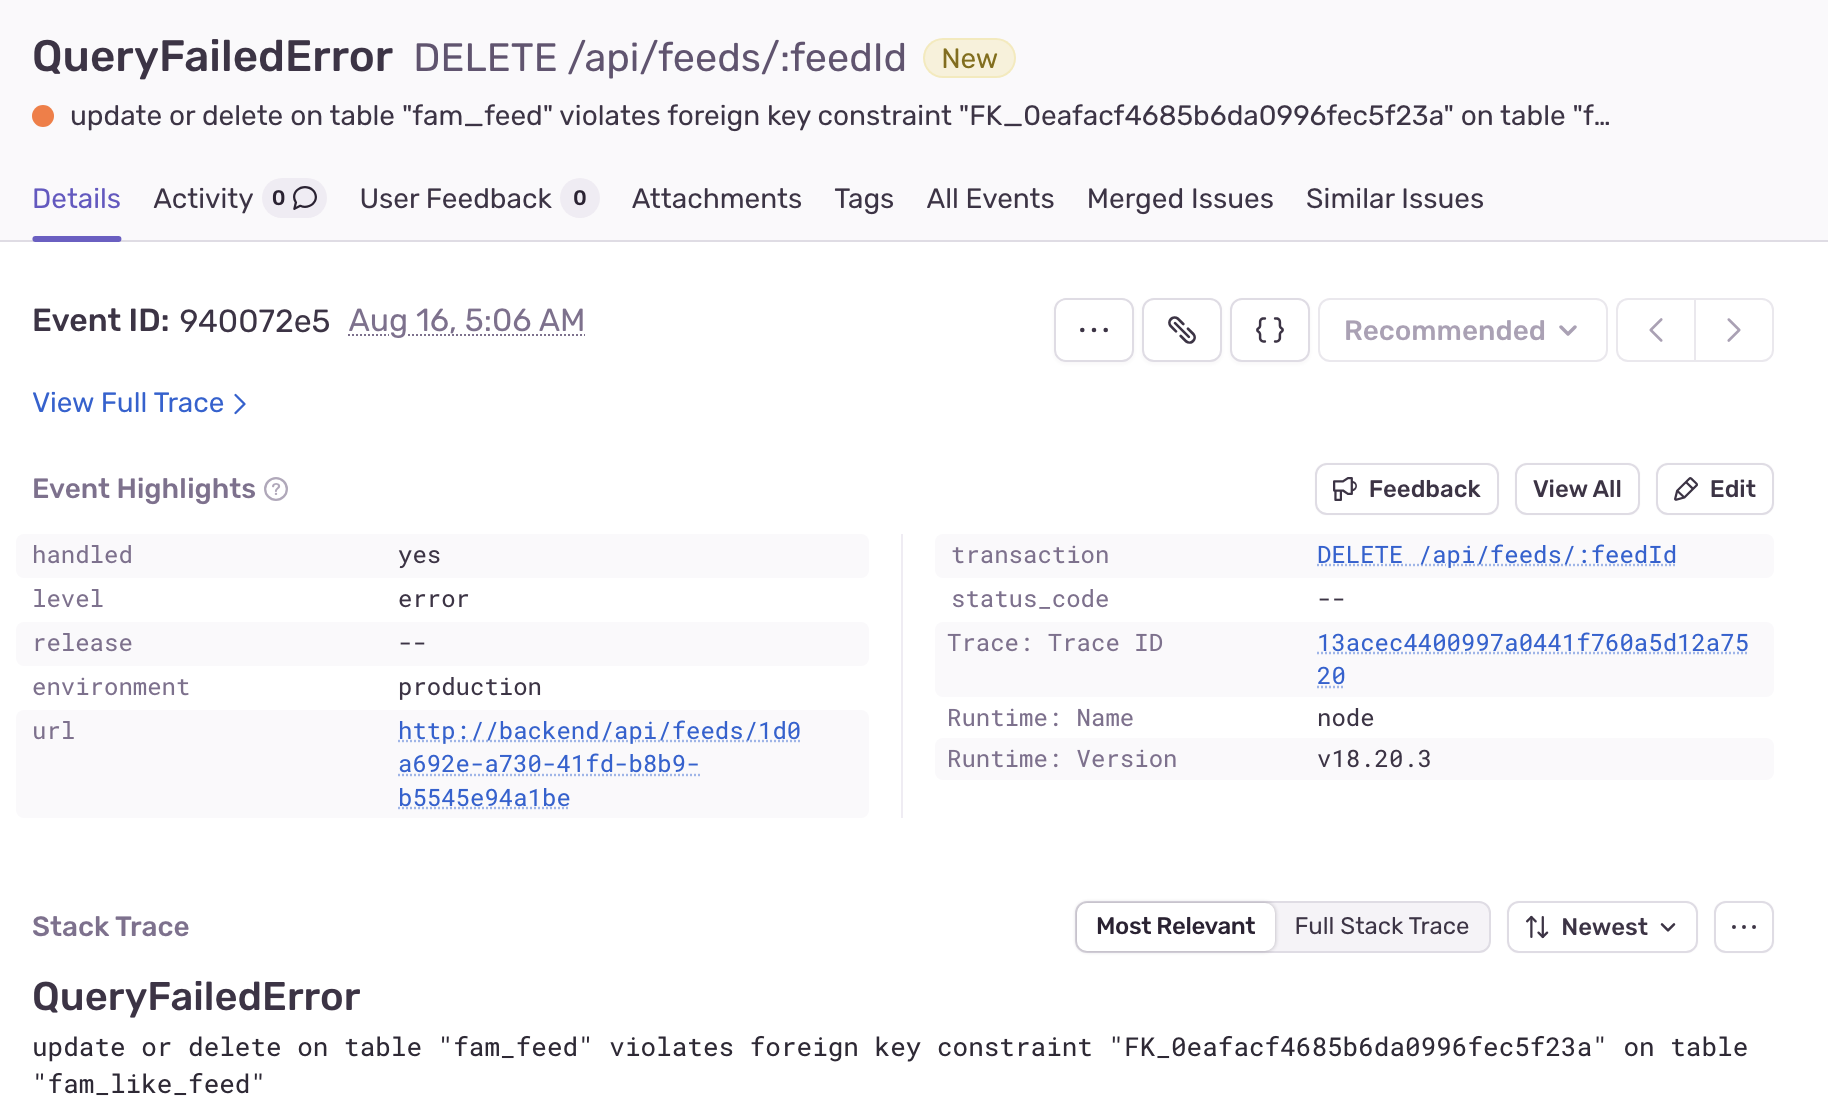
sentry는 production 환경에서만 동작하게 해야 될것 같다! 무료 횟수가 정해져 있다
5. catch 할 수 없는 에러들을 slack 웹훅을 통해 slack 실시간 알림 보내기
글이 길어지는 관계로 따로 아래 해당 내용을 포스팅
추가적으로 공부해야 될 Monitoring
- ( datadog )
- (ELK)
- (grafana 와 prometheus )
Reference
https://docs.sentry.io/platforms/javascript/guides/nestjs/
Nest.js | Sentry for Nestjs
Learn about using Sentry with Nest.js.
docs.sentry.io
728x90